Table of Contents
The first step in managing Master Data in EDMCS starts with registering an application. Probably this is the parameter where EDMCS proves itself superior to DRM and provides multiple application types to be integrated within the product. Registering an application includes a series of steps that a user needs to perform before starting to use it.
To register a sample Planning application in EDMCS (Enterprise Data Management Cloud Service), you would typically follow a series of steps to set up the integration between EDMCS and your Planning application.
Follow the below step-by-step process to register an application within EDMCS.
Registering an Application – Steps
Login to the Application and Register
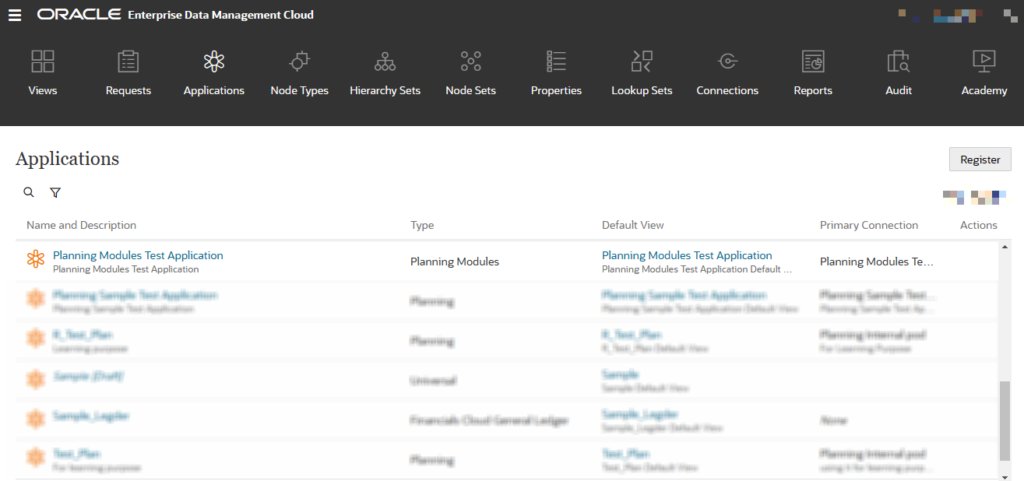
Login to the URL and Click on the Applications icon on the Homepage.
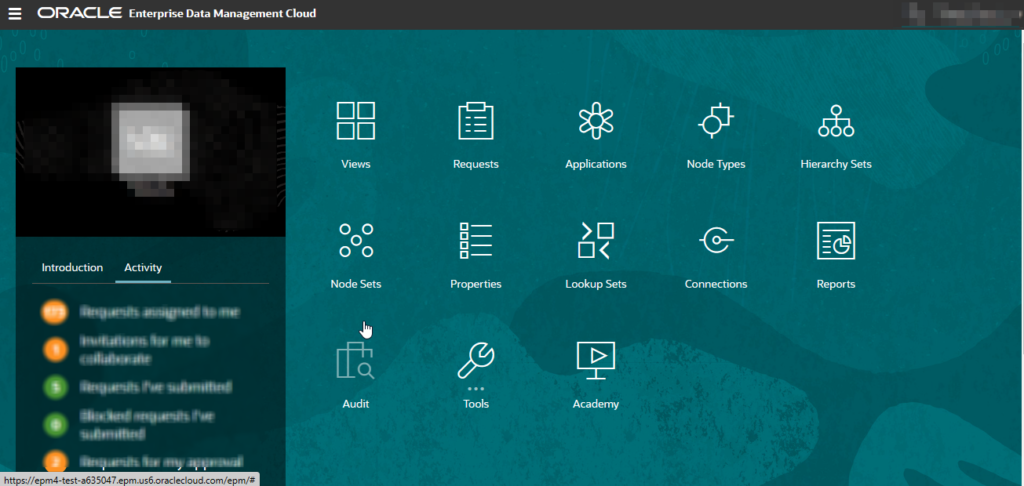
Click Register on the extreme right to register an application.

Choose Planning Modules as the Application Type to register the Planning Application.
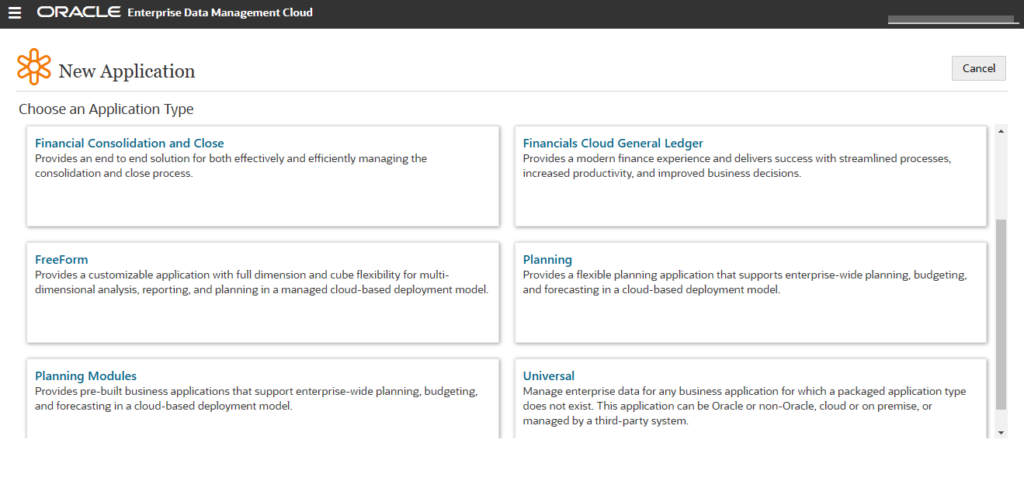
Enter the name of the new Application and its Description and Click Next.

Configure external system connections
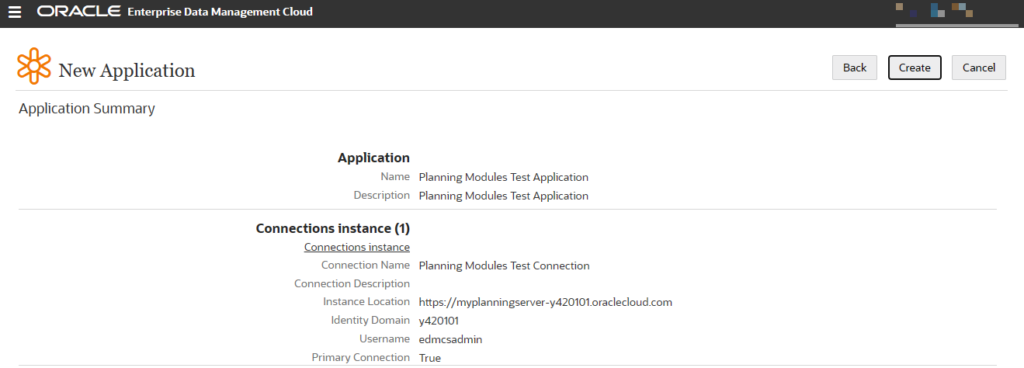
Configure external system connections on the next screen. Click Add and provide the connection details.

After you click on Add, the page will appear to enter connection information. Enter the details of the environment where you want to connect.
Connection Name: Name of the connection
Connection Description: Description of the connection
Instance Location: URL of the Planning cloud environment
Identity Domain: Unique ID associated with the environment
Username: Username that is used to login to the Planning Cloud environment
Click Next once all the required details are entered
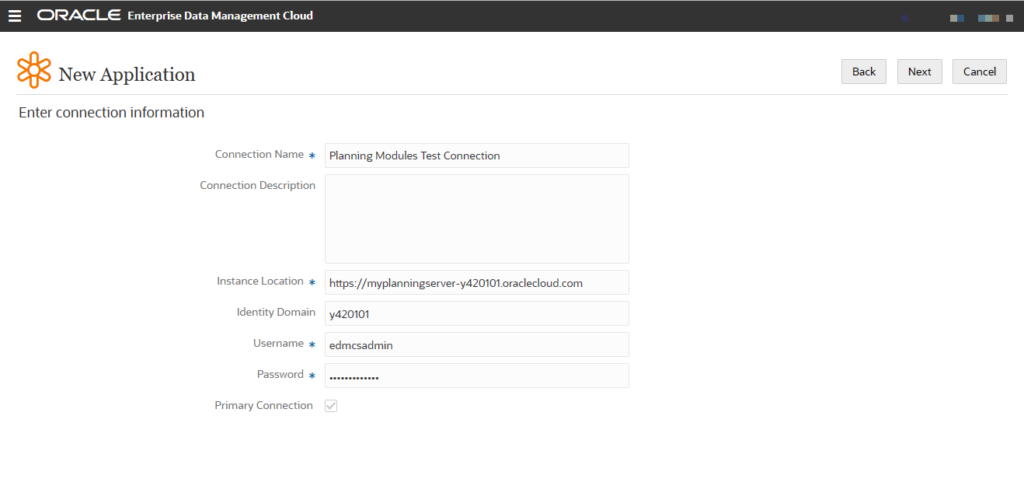
Once the connections are configured, Click Next.

An Application Summary page will be displayed next. Review the details and click Create to Register the Application.
Adding Cubes
The next page will appear where Cube information needs to be provided. Click Add to add any cubes for the Planning Application.

On the next page, enter the Cube information.

Cube Name: Name of the cube in your Planning Application
Specify the cube type: ASO/BSO
Click Add if you want to add more cubes to the Application, else Click Next.

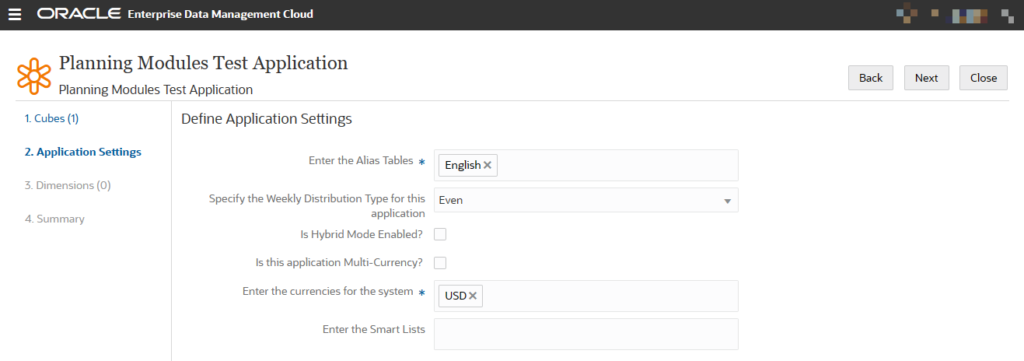
Define Application Settings on the next screen.
Adding Dimensions
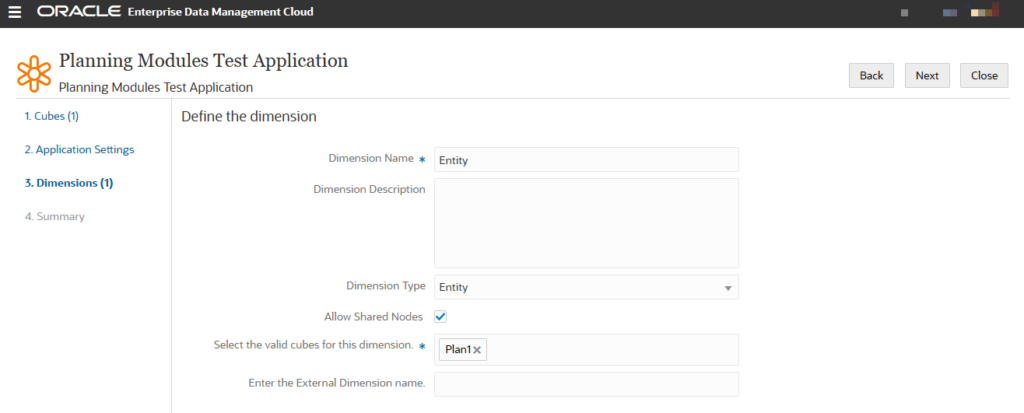
Add Dimensions for the Application. Click Add.

Define the Dimension

Enter Attribute Dimensions for this dimension as per your requirements. click Add to add the attribute dimensions. In case the application does not have any attribute dimensions, click Next.

Define another dimension for your Planning Application
Once all the dimensions are added, Click Next

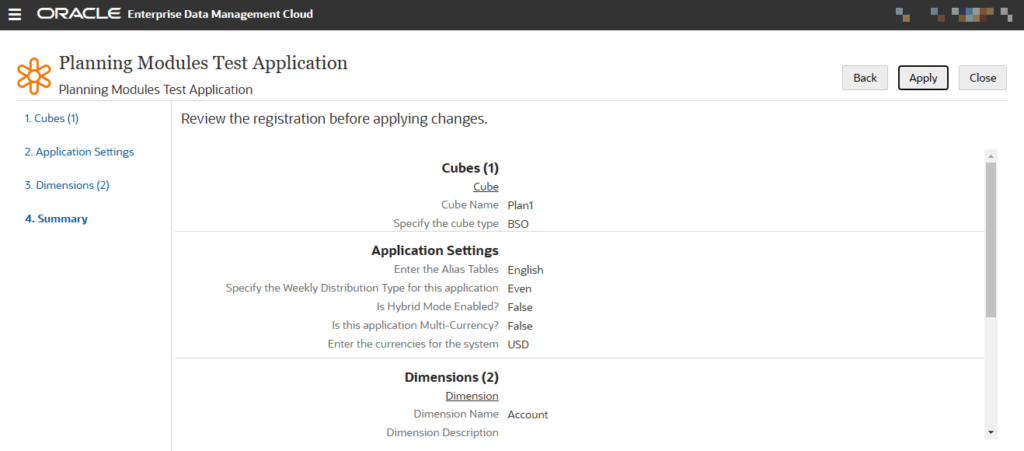
Review the registration
Review the registration and apply the changes
Your newly created Planning Application will be visible under the Applications Tab.
Inspecting an Application
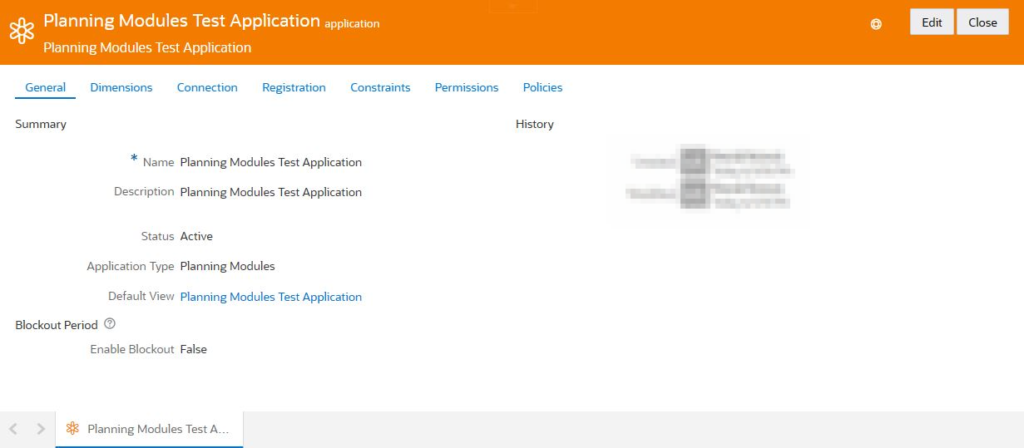
Once an application is registered successfully in EDMCS, a user can Inspect the application to review all the settings provided during the registration process. It also allows you to modify your registration and make changes to the application. To Inspect the application, click on the three dots on the right side of your browser window and click on Inspect.

Deleting an Application
You cannot delete an application that is in Active Status. To delete any application, first modify the registration of the application by clicking on Inspect and changing the Status from Active to Archived. You can now delete the Archived applications.
You also need to Set up security and permissions to determine who can access and modify data in the integration. Ensure that the appropriate roles and access controls are in place.
If you are new to EDMCS, read another article on the Overview of EDMCS. Also, registering different types of applications in EDMCS includes pre-defined adapters. Go through the official Oracle documentation to learn about adapters.
Also, read about the Benefits of EDMCS as compared to other metadata management tools.
Keep Learning…!!!

